Building AI-Assisted Operations: Agentic AI Workshop
Chapter 1: Create Kubernetes Cluster
In this chapter, you’ll provision a DigitalOcean Kubernetes (DOKS) cluster using Pulumi. This cluster will host our AI agents and the workloads they’ll manage.
Goals
- Configure Pulumi ESC to access shared workshop credentials
- Provision a 2-node DOKS cluster in Frankfurt (fra1)
- Export the kubeconfig for kubectl access
- Verify cluster connectivity
Estimated Time: 30 minutes
Step 1: Create and Configure Pulumi ESC Environment
Important: For this workshop, everyone will use a DigitalOcean token managed via Pulumi ESC (Environments, Secrets, and Configuration). This ensures secure credential management without exposing tokens in code or environment variables.
Create the ESC Environment
-
Navigate to Pulumi Cloud and select your organization
-
Go to Environments in the left sidebar and click Create environment
-
Name the ESC project
cfgmgmtcamp-2026-workshop-infra-envand the environmentworkshop, then click Create. This creates the pathcfgmgmtcamp-2026-workshop-infra-env/workshopthat you’ll reference later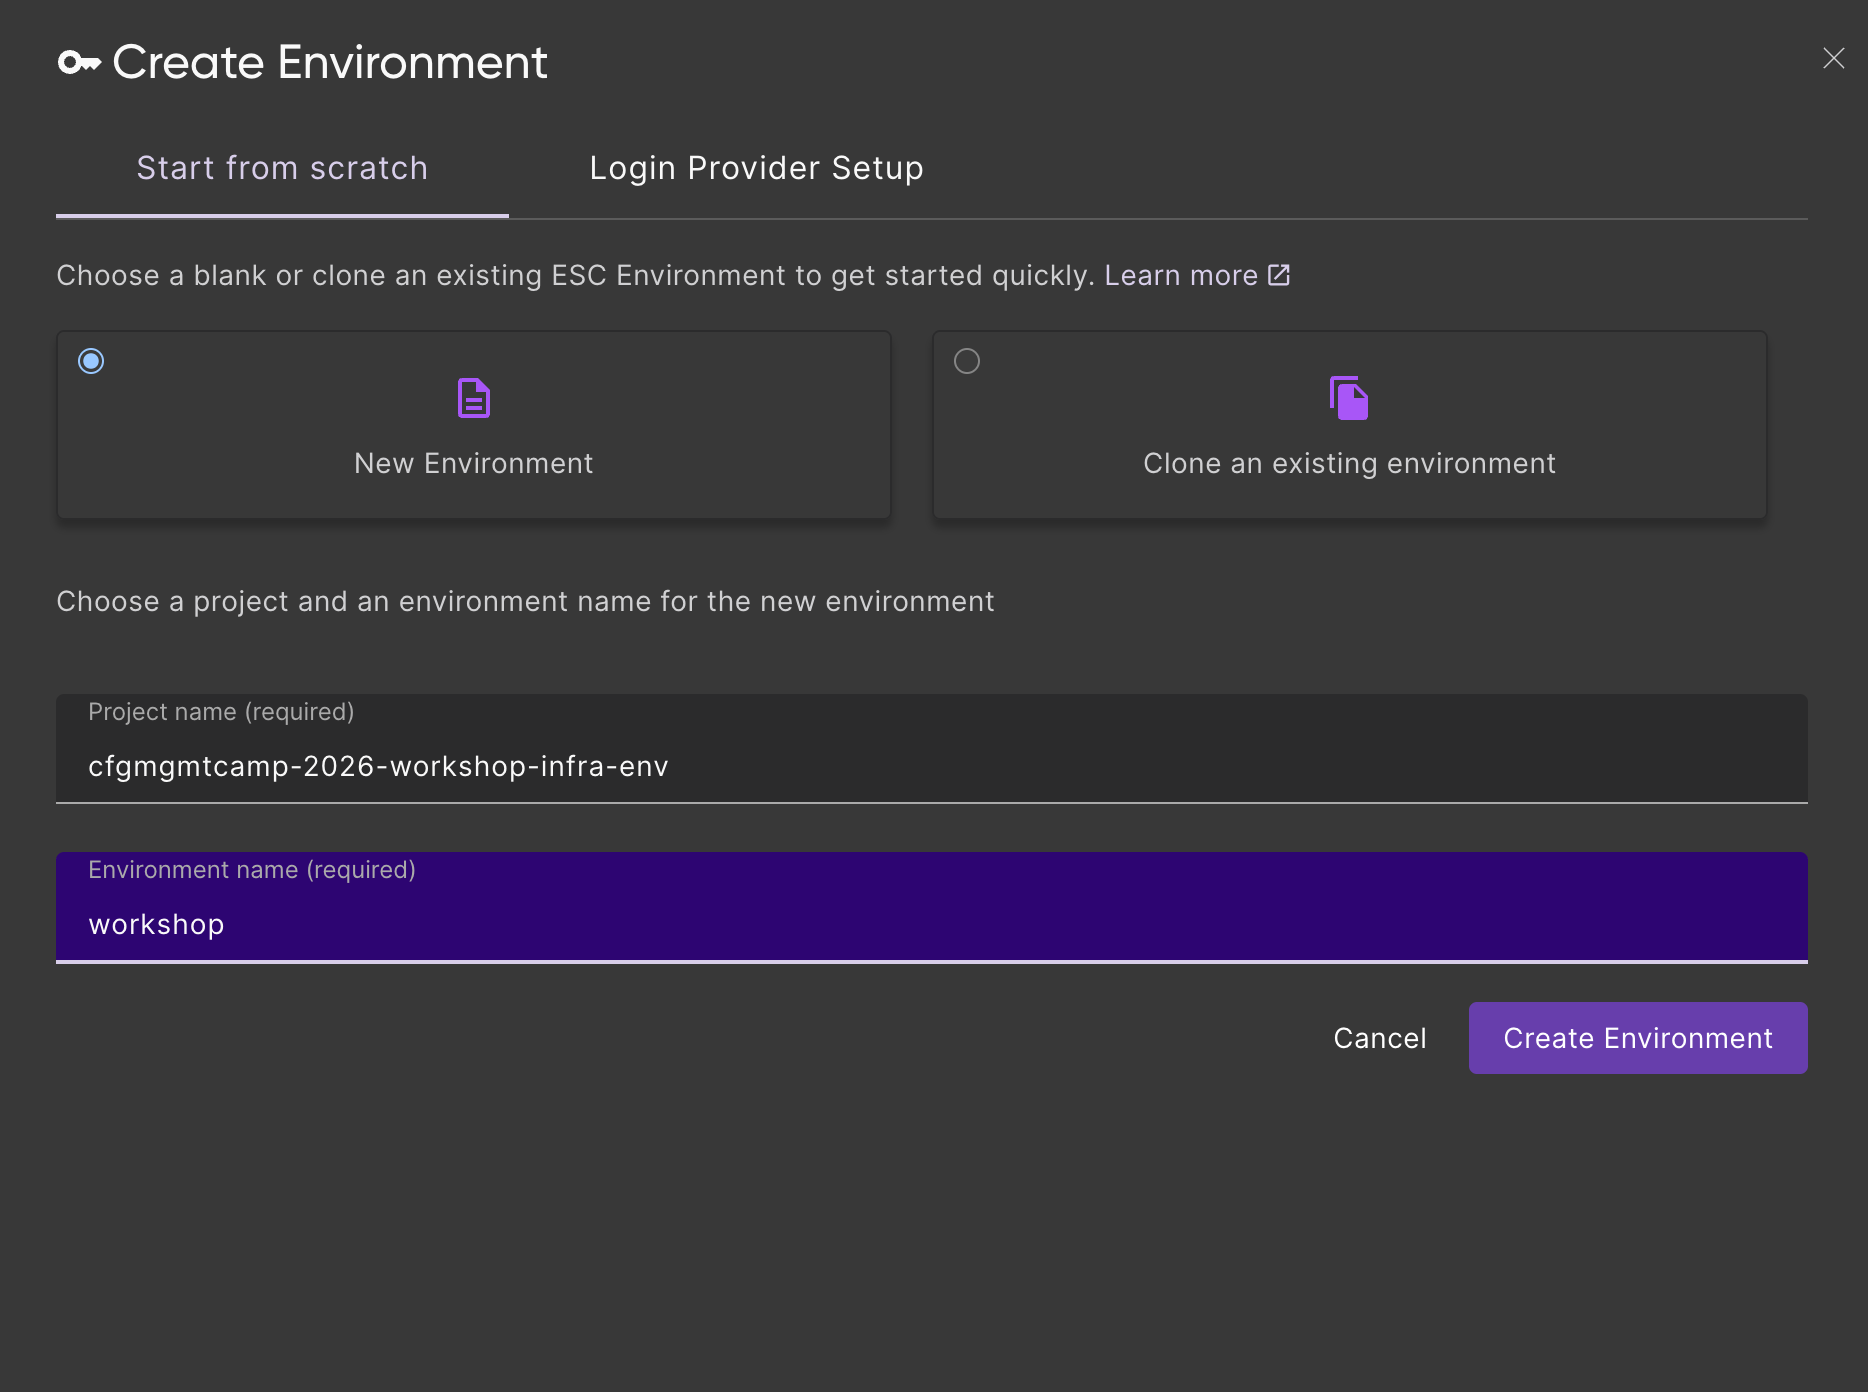
-
In the environment editor, add the following YAML configuration:
values:
  # DigitalOcean API Token
  digitalocean:
    token:
      fn::secret: "dop_v1_your_token_here"

  # Pulumi configuration values (available in Pulumi programs)
  pulumiConfig:
    digitalocean:token: ${digitalocean.token}

  # Environment variables (available in shell)
  environmentVariables:
    DIGITALOCEAN_TOKEN: ${digitalocean.token}
- Replace
dop_v1_your_token_herewith your actual DigitalOcean API token- Get your token from the instructor of the workshop
- The
fn::secretfunction encrypts the value so it’s never stored in plain text
- Click Save to save the environment
Verify the ESC Environment
To verify the ESC environment is working, run:
pulumi env open cfgmgmtcamp-2026-workshop-infra-env/workshop
You should see output similar to:
{
  "digitalocean": {
    "token": "[secret]"
  },
  "environmentVariables": {
    "DIGITALOCEAN_TOKEN": "[secret]"
  },
  "pulumiConfig": {
    "digitalocean:token": "[secret]"
  }
}
The [secret] values indicate your token is securely encrypted.
Step 2: Create the Project Directory
Change into a directory of your choice and create the project folder:
mkdir -p cfgmgmtcamp-2026-agentic-ai-workshop
cd cfgmgmtcamp-2026-agentic-ai-workshop
pulumi new typescript -f
Install the DigitalOcean provider:
npm install @pulumi/digitalocean
Use the ESC Environment in Your Pulumi Stack
Now that the project is created, configure it to use the ESC environment. Create or edit Pulumi.dev.yaml in your project directory to import the ESC environment:
environment:
  - cfgmgmtcamp-2026-workshop-infra-env/workshop
This imports the infrastructure ESC environment which provides:
DIGITALOCEAN_TOKEN- API token for creating DigitalOcean resources (automatically set as environment variable)digitalocean:token- Same token available as Pulumi config for the DigitalOcean provider
Step 3: Write the Pulumi Program
Open index.ts (or equivalent for your chosen language) and add the following code to create a DOKS cluster.
Note: The cluster name includes both the Pulumi organization and stack name (e.g.,
cfgmgmtcamp-2026-alice-dev) to ensure uniqueness when multiple participants deploy clusters simultaneously. This prevents naming collisions in shared environments.
import * as digitalocean from "@pulumi/digitalocean";
import * as pulumi from "@pulumi/pulumi";

// Configuration
const config = new pulumi.Config();
const nodeCount = config.getNumber("nodeCount") || 2;
const nodeSize = config.get("nodeSize") || "s-4vcpu-8gb";
const region = config.get("region") || "fra1";
const k8sVersion = config.get("k8sVersion") || "1.34";

// Get organization and stack name for unique cluster naming
const organization = pulumi.getOrganization();
const stackName = pulumi.getStack();

// Get the latest available Kubernetes version that matches our prefix
const k8sVersions = digitalocean.getKubernetesVersionsOutput({
    versionPrefix: k8sVersion,
});

// Create a DigitalOcean Kubernetes cluster
// Note: Cluster name includes organization and stack name to prevent collisions when multiple
// participants deploy clusters simultaneously (e.g., "cfgmgmtcamp-2026-alice-dev")
const cluster = new digitalocean.KubernetesCluster("workshop-cluster", {
    name: `cfgmgmtcamp-2026-${organization}-${stackName}`,
    region: region,
    version: k8sVersions.latestVersion,
    nodePool: {
        name: "default-pool",
        size: nodeSize,
        nodeCount: nodeCount,
        labels: {
            "workshop": "cfgmgmtcamp-2026",
            "purpose": "agentic-ai",
        },
    },
    tags: ["cfgmgmtcamp", "workshop", "2026"],
});

// Export cluster details
export const clusterName = cluster.name;
export const clusterEndpoint = cluster.endpoint;
export const clusterUrn = cluster.clusterUrn;

// Export kubeconfig for kubectl access
export const kubeconfig = cluster.kubeConfigs[0].rawConfig;
Click to see YAML version
name: 01-k8s-cluster
runtime: yaml
description: DigitalOcean Kubernetes cluster for CfgMgmtCamp 2026 workshop

config:
  nodeCount:
    type: integer
    default: 2
  nodeSize:
    type: string
    default: s-4vcpu-8gb
  region:
    type: string
    default: fra1
  k8sVersion:
    type: string
    default: "1.34"

variables:
  k8sVersions:
    fn::invoke:
      function: digitalocean:getKubernetesVersions
      arguments:
        versionPrefix: ${k8sVersion}

resources:
  workshop-cluster:
    type: digitalocean:KubernetesCluster
    properties:
      name: cfgmgmtcamp-2026-${pulumi.organization}-${pulumi.stack}
      region: ${region}
      version: ${k8sVersions.latestVersion}
      nodePool:
        name: default-pool
        size: ${nodeSize}
        nodeCount: ${nodeCount}
        labels:
          workshop: cfgmgmtcamp-2026
          purpose: agentic-ai
      tags:
        - cfgmgmtcamp
        - workshop
        - "2026"

outputs:
  clusterName: ${workshop-cluster.name}
  clusterEndpoint: ${workshop-cluster.endpoint}
  clusterUrn: ${workshop-cluster.clusterUrn}
  kubeconfig: ${workshop-cluster.kubeConfigs[0].rawConfig}
Step 4: Deploy the Cluster
Run pulumi up to create the cluster:
pulumi up
Review the preview and select yes to proceed. The cluster creation takes approximately 5-10 minutes.
This is a good time for a coffee break.
Step 5: Configure kubectl
Once the cluster is ready, save the kubeconfig:
pulumi stack output kubeconfig --show-secrets > kubeconfig.yaml
export KUBECONFIG=$(pwd)/kubeconfig.yaml
Step 6: Verify the Cluster
Check that the cluster is accessible:
kubectl get nodes
You should see output similar to:
NAME                       STATUS   ROLES    AGE   VERSION
default-pool-xxxxx-xxxxx   Ready    <none>   5m    v1.34.x
default-pool-xxxxx-xxxxx   Ready    <none>   5m    v1.34.x
Verify the cluster information:
kubectl cluster-info
Checkpoint
Before proceeding, verify:
pulumi upcompleted successfullykubectl get nodesshows 2 Ready nodeskubectl cluster-infoshows the cluster endpoint
Stretch Goals
If you finish early, try these challenges:
- Add a second node pool: Create a separate pool for workloads with different resource requirements
- Enable auto-scaling: Configure the cluster autoscaler to scale between 2-4 nodes
- Add custom tags: Add your name as a tag to identify your cluster